Diagnose Sick Cannabis Plants | Marijuana Nutrient Problems & Symptoms by Picture

Hempatia Soma iGrow Hemps garden

L0oD

Form
Poznanik Foruma
09.03.2015
5.686
20.015
398
Planeta Zemlja
www.vutra.org
Root Rot


Cannabis Root Rot - Slimy brown roots.
Screenshot_1.png
Root Rot Leaf Symptoms: burnt edges or tips; yellow, bronze or brown spots or stripes;nutrient deficiencies; clawing and curled edges; other unusual leaf symptoms. Screenshot_2.png
Important: The Following Roots Are Stained From Nutrients - They Are NOT Brown From Root Rot Screenshot_3.png
(the easiest way to tell the difference between healthy stained roots and sick roots is root rot looks slimy, while you can see each individual "strand" on healthy cannabis roots)

What To Do About Marijuana Root Rot & Root Slime


Problem: Your cannabis plant starts drooping, leaves start getting sick, and roots are brown,smelly and/or slimy. These are all symptoms of cannabis root rot.Roots need water, but if they are get too much water without enough oxygen they are much more s usceptible to root rot. This is often caused by too-hot conditions, overwatering, and/or not enough bubbles dissolving oxygen into a DWC water reservoir.

Healthy roots are white to cream-colored while roots affected by root rot are brownish and actually may even smell like mildew or rotting.
Screenshot_4.png
Healthy roots are white to cream-colored while roots affected by root rot are brownish and actually may even smell like mildew or rotting.

Plants affected by root rot will spontaneously start losing their leaves, leaves become yellow or bronze.The plants start drooping, wilting, or otherwise looking like they're dying.

The very first sign of root rot in cannabis (besides brown roots) is usually wilting or drooping.Sometimes the plant will not wilt, or will recover from wilting while still showing other signs of root
rot. Although wilting is common, you cannot be sure your plant doesn't have root rot just because it's not wilting. It's much more important to look at the roots in order to accurately diagnose root rot.
Screenshot_5.png Screenshot_6.png

The wilting will soon be followed by other symptoms to the leaves, especially burning, brown spots,nutrient deficiencies, spotting, and other unusual leaf symptoms.
Screenshot_7.png Screenshot_8.png
You will also notice that affected plants will start drinking less water. If you notice these symptoms in your cannabis plant, then it can't hurt to try all the suggestions for stopping root rot.
Screenshot_9.png Screenshot_10.png
It's important to notes that damage is permanent to both the roots and the leaves.

Old brown roots will never turn white again. Brown leaves will never turn green again. You need to insteaed be looking at new growth for signs of root rot recovery.

A recovering plant will be able to make new growth, but it's old infected roots will likely never recover. Instead, you know that recovery is happening when new white roots start growing from the old
brown ones.

Root rot mostly affects hydroponic systems, but can also result from over watering your plants in soil or other medium. Basically anytime the roots are sitting in water, they are at risk of devloping
root rot.

Plants may appear overwatered or droopy, sometimes plants wilt overnight.
Brown, slimey, smelly roots.
Plant leaves often start turning yellow or white.
Leaves start dying and falling off rapidly
Oftentime you'll see what appears to be a random mix of nutrient deficiencies on the leaves - this is due to the fact that the plant can't absorb nutrients properly at the roots even if they're there.
Plants drink much less water than usual.
Screenshot_11.png
Now that you know what root rot looks like, it's time for the cannabis root rot solution!


Solution: It can be tough to get rid of root rot and many people feel it's easier to just scrap the plant and start over. However, there are proven techniques that will cure your plant of root rot problems. In order to get rid of root rot successfully, you need to take a two pronged approach.
You will need to treat the plant's root directly and you will also need change the plant's environment so that root rot no longer has a good place to grow.

If you don't fix the environmental causes of root rot, then it will just keep coming back no matter what you do. Therefore, it's important to go through the below list and make sure you're covering
all your bases to prevent a re-occurrence. It's also important to note that affected roots will likely never recover, just like how discolored leaves on the plant will never recover. What you're looking for
is new, healthy white root growth.

How to prevent and treat root rot:


1. Lower the temperature of the grow space, which also lowers the temerature of the water in your reservoir.Water can't hold much dissolved oxygen at higher temperatures and your plants need oxygen to "breathe."Getting more oxygen to the roots not only prevents root rot, it makes your plants grow much faster.If it's too hot in the grow space, you're much more likely to run into root rot. The maximum recommended temperature for the water in your reservoir is around 72°F (22°C). When using a great supplement like
Hydroguard you can usually keep the temps a bit higher without as much of a problem.

2. Some people like to add beneficial bacteria to their water to help prevent and treat root-related plant diseases and help make nutrients available to the plant. Some of the formulas available are
Hydroguard, Aquashield, Piranha, VooDoo Juice, Great White (Great White has great reviews, yet is obscenely expensive), Subculture B, Rooters, and Plant Savers. Most of these can be used with both hydro and soil grows. I personally recommend Hydroguard because I've used it successfully to treat Root Rot.

3. As I mentioned, it is incredibly beneficial to try to get as much oxygen as possible dissolved in your water. Therefore it's a good idea to buy a BIG air pump and big air stones for your hydroponic system.
The more bubbles and surface agitation, the better, as this dissolves more oxygen into the water. Root rot cannot thrive in an oxygen-rich environment and your plants roots will love it.

4. If you have a hydroponic system, it's best to change your reservoir water regularly.I recommend trying to change your water at least every two weeks, though many growers recommend you change
the reservoir once a week. Regularly changing your water will also help your plants get better access to nutrients, and help prevent deficiencies and toxicities.

5. In a hydroponic system, make sure that any dead roots, dead leaves or other types of plant debris doesn't get into the reservoir because they will provide a breeding ground for bad bacteria as they start
rotting. If you do notice organic matter in the res, fish it out as soon as possible.
6. Don't let any light get to your roots or reservoir water, as it provides heat and light which will promote the growth of bacteria.

7. You will need to keep your grow area as clean as possible at all times to stop bacteria before it starts.Before you begin your grow, you should also thoroughly clean all grow-related items to kill all bacteria.

8. Some people recommend treating root rot with H2O2, also known as hydrogen peroxide. While adding hydrogen peroxide to your water will kill all bacteria including root rot,it is only effective in your
system for a day or since the H2O2 is quickly converted to oxygen and water. Therefore, if you use hydrogen peroxide as a treatment for root rot, you will need to treat your water daily to prevent re-occurances. I have tried used commercial grade H2O2 before, and I was never able to use it to get rid of root rot, so this is NOT RECOMMENDED!

Your plant can completely recover from root rot as long as you catch the problem early enough,so it's important to stay vigilent of root rot during your first couple of grows, expecially when growing
with hydroponics.

Don't Use Hydrogen Peroxide (H2O2)! H2O2 is temperarily effective at best when it comes to getting rid of root rot. It makes me so sad when people tell growers to use H2O2 (hydrogen peroxide) to kill root rot.
Even the commercial grade stuff just doesn't work (and I've tried)!

All H2O2 does is cause bubbling near the dead brown roots (or any organic matter), which is why I think people believe it's helping. In my experience it doesn't help the plants themselves (they don't look any
better), and what's worse, all the H2O2 will be completely gone from the water within 24 hours.
Screenshot_12.png
H2O2 kills most of the bacteria in the reservoir, including any good bacteria, and does absolutely nothing to address the underlying problem. Although H2O2 does kill bad bacteria, it leaves enough of it there to repopulate your reservoir. As common as the advice to use H2O2 for root rot is, I've never seen a case by a real grower who was actually able to get rid of root rot with H2O2.

Recommend Botanicare Hydroguard (the newer, improved version of Botanicare's popular "Aquashield" root supplement) for marijuana root problems because I've used it successfully to get rid of a terrible case
of Root Rot (and by 'successul' I mean new white roots exploded out of the old mushy brown ones and I was able to eventually harvest the buds - look at the pics below).

Hydroguard (and their old supplement Aquashield) are also much cheaper than most other similar root treatments.
One important thing to note is that after you treat the cause of root rot, the old brown roots will likely never recover. Neither will the damaged leaves!

Take a look at what happens with the roots from using a supplment like Hydroguard or Aquashield.

With recovery...

What you are looking for is new healthy white roots growing out of the old brown roots.Eventually, as the root ball gets bigger, you will no longer be able to see the old brown roots.After you start noticing a recovery, some growers will snip off old dead roots, but I often don't.

Before - Roots Just Got Root Rot
Screenshot_13.png Screenshot_14.png
Roots are beginning to recover...

Notice the new white roots growing out of the old brown dead ones within just a day or two of receiving.Aquashield in the reservoir. By this point, the plant has stopped showing any new symptoms and appears
to be growing normally.
Screenshot_15.png

Roots are now mostly recovered below...

Notice that you can barely see any signs of the old brown, and all the new roots generally appear white and healthy. The plants on top are lush, healthy, and fast-growing, though the old burnt leaves never recovered. Screenshot_16.png

Yuck! Follow This Tutorial and Never Get Root Rot Again!
Screenshot_17.png


Leaf Color:
Edges Appear Brown or Burnt
Pale Color Leaves
Yellow Leaves - New Growth
Yellow Leaves - Lower, older leaves
Brown or Dark Spots
Leaf Symptoms:
Leaf Edges Appear Burnt
Leaf Tips Appear Burnt
Leaf Tips Die
Spots
Old Leaves Dropping Off
Slow Growth
Abnormal Growth
Leaves Curl Under
Leaves Curl Upwards
Wilting / Drooping
Plant Symptoms:
Weak Stems
Slow Growth
Plant Wilting / Drooping
Root Symptoms:
Brown
Smelly
Mushy
Slow Growing
 
  • Sviđa mi se
Reactions: Peroooooo

L0oD

Form
Poznanik Foruma
09.03.2015
5.686
20.015
398
Planeta Zemlja
www.vutra.org
Pests-Bugs-Virus


Unfortunately, bugs or pests can totally mess up your marijuana harvest.

Some bugs live in soil, while other pests are airborne. Mold can be a big problem too.But you don't have to sit back and take it.

This page aims to be a comprehensive resource on the different types of bugs / pests / mold that can affect your marijuana crop, along with tips for preventing and solving each problem.
Screenshot_1.png
Pests that can affect your marijuana plants include aphids, spider mites, ants, whiteflies,white powdery mildew / white powdery mold, stem rot, and even mammals such as gophers and rats.
It's time to fight back against cannabis bugs, mold and pests!

Aphids
Screenshot_2.png

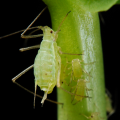
Aphids are soft-bodied insects which can be green, yellow, black, brown or red.
They are usually small and oval-shaped, and may have dicernable wings or antennae.
Aphids use their piercing, sucking mouth-parts to feed on the sap of plants and usually occur in colonies located on the undersides of stems or leaves.
If a plant becomes heavily-infested, its leaves can turn yellor or wilt due to the excessive sap removal.
Aphids produce large amounts of a substance known as "hondeydew," a sugary liquid waste.
Honeydew drops from these insects and can causes spots on the windows and finish of cars which are parked under infested plants.

A fungus called sooty mold can grow on honeydew deposits which accumulate on the leaves and branches of your plant, turning them black. Many times, an aphid infestation is only noticed after the first
appearance of sooty mold.
The drops of sweet honeydew can also attract other insects such as ants.
An infestations is generally the result of a small numbers of winged aphids that fly to the plant and take it up as their new host.

Winged aphids deposit several wingless young on the tender undersides of leaves/steams before moving on to find a new plant. Screenshot_3.png
Immature aphids, or nymphs, that are left behind, feed on plant sap and increase gradually in size.

They mature in 7 to 10 days and then are ready to produce live young. Usually,all of them are females and each is capable of producing 40 to 60 offspring.

The process is repeated several times, resulting in a tremendous population explosions.Less than a dozen aphid "colonizers" can produce hundreds to thousands of aphids on a plant in a few weeks.Aphid numbers can build until conditions are so crowded, or the plant is so stressed, that winged forms are produced. These winged forms fly off in search of new hosts and the process is repeated.

Solution: Early detection is the key to reducing aphid infestations.

The flight of winged colonizers cannot be predicted, so weekly examination of plants will help to determine the need for control.
Examine the bud area and undersides of the new leaves for clusters or colonies of small aphids.The presence of these colonies indicates that the aphids are established on the plants and their numbers will begin to increase rapidly.
Fatty acid salts or insecticidal soaps are very good against aphids. They apparently work to disrupt insect cell membranes. They require direct contact with the insects and leave no residual effect.

Nervous system insecticides, such as malathion, Dursban (chlorpyrifos), and Orthene (acephate),are labeled for use on many shade trees and ornamental plants for aphid control.

As with soaps, coverage is very important and a follow-up application may be necessary. Sevin (carbaryl) is not effective against many aphids so it is generally not a good choice for control unless recommended
specifically.In fact, applications of Sevin may reduce the number of beneficial insects, such as lady beetles, and increase the potential for aphid outbreaks.
Beneficial insects, such as lady beetles, lady bugs, and lacewings may eat large numbers of aphids but the reproductive capability of aphids is so great that the impact of the natural enemies may not be enough
keep these insects at or below acceptable levels. To keep aphids and other pests off your plants just finely chop1 onion and 2 medium cloves of garlic.Put ingredients into a blender with 2 cups of water and blend on high. Strain out pulp.Pour liquid into spray bottle. Spray a fine mist on plants, making sure to coat both tops and bottoms of
leaves.


Caterpillars, Inchworms & Cabbage Loopers


Caterpillars, Inchworms & Cabbage Loopers
Caterpillars!!! Argh!!! Sometimes the first sign of caterpillars/worms/cabbage loopers is just seeing chunks of your leaves missing. You may also see clumps of black/brown "dirt" on your leaves, which is
caterpillar poop. Lastly, you may actually catch a caterpillar munching on your leaves! It makes me so angry to catch them in the act!

Leaves Are Missing Chunks
Screenshot_4.png

caterpillar leaf damage pic by molpes

Caterpillar Droppings on Leaves
Screenshot_5.png
You Actually See Caterpillars, Inchworms or Cabbage Loopers
Screenshot_6.png

Screenshot_7.png Screenshot_8.png

Screenshot_9.png


Spinosad Products (safe & organic) - Although not as effective against caterpillars as a BT product,Spinosad can be a good choice, especially if your plants are also suffering from other insects like aphids,
spider mites, thrips or white flies since this will attack all of them at once. Spinosad products are organic and completely harmless to pets, children, and plants. Unlike many insecticides, you can spray
properly diluted spinosad heavily on leaves and roots with basically no negative effects. Spinosad products can be used directly to kill caterpillars on contact, but can also be used when watering plants
to systematically kill caterpillars via the soil.
Spinosad is an organic insecticide made from the fermentation of a specific soil bacteria(actinomycete Saccharopolyspora spinosa) and kills caterpillars via ingestion or contact by effecting the
insect nervous system. Spinosad can be a good choice for organic and outdoor growers, because it is very toxic to caterpillars, but is less toxic to many beneficial insects.

Note: Most spinosad products are effective for only about 24 hours after being mixed with water, so only mix as much as you will need per application. Anything left over will be waste.


Root Rot (Pythium)


Root rot is caused by pythium, an organism that lives off of cannabis roots. It makes roots smelly, slimy and brown, and if root rot get bad it can quickly kill a plant. Root rot appears most often in hot temps
when plant roots are not able to get enough oxygen. While pot-bound plants can be affected by root rot when they're overwatered, root rot is usually a problem for hydroponic plants grown directly in water,
such as deep water culture or bubbleponics.
Screenshot_10.png
Symptoms of Pythium Root Rot include: Roots are slimy, smelly, brown or dead. Plants stop growing and start looking droopy. Leaves begin to yellow and start getting what appears to be nutrient deficiencies.
Learn How to Prevent & Get Rid of Root Rot!


Slugs/Snails


The common slug is too common a pest to even need much of an introduction. Slugs attack a wide range of plants, causing anything from slight damage to death.
Screenshot_11.png
Unfortunately, these annoying pests attack leaves AND buds, and they can do a surprising amount of damage in a short time, so you want to watch out for them and get rid of them quickly.

They often stay hidden, attacking your plants at night, so stay vigilent for slug and snail damage!

Solution: There is no foolproof method for eradicating slugs.

How to Make Beer Trap for Slugs and Snails: mix flour with some stale beer and use it to fill a shallow container. Place in garden with the rim 1 or 2 cm above the ground so that slugs and snails can climb in.
Substitute beer for wine, sugar water, juice, or water mixed with yeast.
BE WARNED, the trap will fill up quickly so come back often to empty.
To be sure you're keeping your slimy slug population under control; collect them by hand at night or on damp days. Try collecting them under a tile or wet cardboard, and squash all eggs you find while digging.Placing a saucer of salt is another method that will kill snails and slugs.

Martha Stewart recommends coiling a piece of wire around the base of your plants to give slugs a shocking experience.


Thrips


Thrips are small, fast-moving insects with wings.

They suck the good stuff out of leaves, and prefer to munch on flowering tops and young, tender foliage.Leaves that have been attacked by thrips have shiny, silvery spots where they were bitten.

In spite of the fact that thrips are very small, they're relatively easy to spot so you can see them marching in columns on an infested plant.

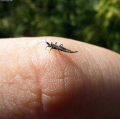
Here's a picture of a thrip on a finger for scale - they're tiny!
Screenshot_12.png
Recommeded: Monterey Garden Insect Spray with Spinosad to kill them...


Tobacco Mosaic Virus

The tobacco mosaic virus can attack a wide range of plants, including tomato, pepper, eggplant, tobacco,spinach, petunia, marigold, and our beloved herb marijuana. On marijuana the virus infection causes light and dark green mottled areas on the leaves.
The dark green areas tend to be somewhat thicker than the lighter portions of the leaf. The leaf mottling is seen more easily if the affected plant surface is partially shaded.
Screenshot_13.png

Stunting of young plants is common and often is accompanied by a distortion and fern-like appearance of the leaves. Older leaves curl downward and may be slightly distorted.
Certain strains of the virus can cause a mottling, streaking and necrosis of the buds. Infected plants are not killed, but they produce poor quality buds and low yields. Tobacco mosaic, is incited by a virus. The tobacco mosaic virus is very stable and can persist in contaminated soil, in infected plant debris, on or in the seed coat, and in manufactured tobacco products. The virus is transmitted readily from plant to plant by mechanical means.

Solution: Virus diseases cannot be controlled once the plant is infected.

Therefore, every effort should be made to prevent introduction of virus diseases into the garden.

Sanitation and cleanliness is the primary means of controlling virus diseases.

Infected plants should be removed immediately to prevent spread of the pathogens.

The use of tobacco products during cultural practices should be avoided to prevent inoculation of plants with the tobacco mosaic virus.

Those people using tobacco or working with infected plant material should wash their hands thoroughly in soapy water before handling your plants.

This may simply involve picking up the virus while working with infected plant material,then inoculating healthy plants by rubbing or brushing against them with contaminated tools, clothing,
or hands. Aphids are not vectors of the virus, although certain chewing insects may transmit the pathogen.


White Flies / Whitefly


White flies behave just like spider mites.

The insect hides underneath the leaf, punctures the eaf and sucks up the essential nutrients from the plant.

This results in white spots on the top side of the leaf.

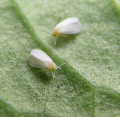
White flies are easily spotted with the naked eye. If you shake the plant a little, they'll fly around.They look like little white moths, around 2 millimeters in size.

Screenshot_14.png
Bleach solution (1 tablespoon of bleach to 1 gallon of pH balanced, water in a spray bottle or mister) -make sure to clean all surfaces of your room, and bleach them too if possible.

Alcohol and Water mixed togther will also kill the bugs on contact and shouldn't hurt the plant as long as the solution contains at least 40% water. You will want to use a spray bottle or mister.

SM-90 (Safe & Organic) mixed with water (1 part SM-90 to 5 parts water) kills whiteflies on contact and is organic (it even smells good!). You will need a mister to get nice even coverage on all the leaves
with SM-90.

Neem Oil works in a similar way to SM-90, though Neem oil doesn't smell as nice and will leave an unpleasant taste/smell on buds when used to treat flowering plants. There's some evidence Neem oil may be
harmful to humans so use with care! Just as with SM-90, you will need a mister to get all the leaves evenly,especially since neem oil and water will separate easily.


Leaf Color:
Edges Appear Brown or Burnt
Pale Color Leaves
Yellow Leaves - New Growth
Yellow Leaves - Lower, older leaves
Yellowing Between Veins
Dark or Purple Leaves
Black or Gray Patches on Leaves
Patches of white powder on leaves
Brown or Dark Spots
Mottling / Mosaic Pattern
Leaf Symptoms:
Upper Leaves / Newer Growth Affected
Lower Leaves / Older Growth Affected
Leaf Edges Appear Burnt
Leaf Tips Appear Burnt
Leaf Tips Die
Yellowing Between Veins
Patches of white powder on leaves
Red Stems
Spots
Mottling / Mosaic
Old Leaves Dropping Off
Slow Growth
Twisted Growth
Abnormal Growth
Leaves Curl Under
Leaves Curl Upwards
Wilting / Drooping
Webbing on leaves
Plant Symptoms:
Red or Purple Stems
Weak Stems
Old Leaves Dropping Off
Slow Growth
Twisted Growth
Leaves Curl Under
Leaves Curl Upwards
Plant Wilting / Drooping
Root Symptoms:
Slow Growing
Other Symptoms:
Webbing
Bugs
Mold
Buds Not Fattening
 
  • Sviđa mi se
Reactions: Peroooooo

L0oD

Form
Poznanik Foruma
09.03.2015
5.686
20.015
398
Planeta Zemlja
www.vutra.org
Root Problems


Cannabis Plants With Root Problems Show Many Symptoms

Cannabis may appear overwatered or droopy
Curling or cupping of leaves
Wilting - either individual stems wilt or the whole plant may wilt
Leaf yellowing
Brown spots / Burnt spots
Other strange nutrient problems
Brown or slimy roots - this is often a sign of root rot
Smelly runoff water (smells rotting or musty)
Leaves may start dying and falling off rapidly
Plants drink much less water than usual
Screenshot_1.png Screenshot_2.png Screenshot_3.png

The cannabis plant below did not have any drainage holes (water could not drain out the bottom of the pot). Notice the strange twisting of some of the leaves. When roots are left in stagnant water for too long,
they cannt get enough oxygen and tend to develop root problems.
Screenshot_4.png
This particular type of cupping of the leaves below is common among cannabis plants with root problems.In this case, the plant had no drainage from the bottom of the solo,cup,so water was just pooling at the bottom for the roots to sit in. Once the grower poked holes in the bottom of the cup, this problems went away (the cupped leaves didn't recover, but new leaves started growing in happy and healthy).
Screenshot_5.png
Sometimes leaves will tend to cup or curl down due to root problems, like the plant above, but sometimes the curl upwards too, like the poor plant below (this was caused by poor drainage and plant was overwatered,leading to a pretty severe case of root problems):
Screenshot_6.png
This next plant was also overwatered and had no drainage. Notice how dark the soil is and the green algae growing all along the top of the soil - these are more signs the plant has been overwatered for quite a
while. You should never water your plant when the soil is still wet at the top, and if you notice lots of algae growing on top of your soil, it may be a sign that you're overwatering on a regular basis. Screenshot_7.png
The grower of the next plant was going on vacation for a few days, so they chose to overwater their plant in hopes it would be enough water until they got back. While they were gone, they had a huge heat wave.
So this plant was subjected to overwatering plus heat. A few days later, when the grower came back,they saw that the leaves were cuppping upwards and had turned lime green. The stems and veins of the
leaves were turning red. You can see the soil is still dark and wet because the plant stopped drinking after developing root problems.
Screenshot_8.png
Possible Triggers For Root Problems

Heat - cannabis is more likely to have root problems at higher temperatures

Cold - cold roots are unhappy roots - cold shock can cause wilting and other problems

Over-watering potted plants - too much watering tends to cause root problems

No drainage hole at the bottom of the container - if water can't get out and water is sitting at the bottom of the pot, the roots can "drown"

Muddy or thick soil - if your soil is muddy and thick instead of rich and fluffy, it may mean the soil doesn't hold enough oxygen to support your roots.

Small plant in a big container - When a seedling (or small plant) is in a big container, it often has trouble getting enough oxygen at the roots. Until the plant has grown bigger and started to fill up the
container, it's important to avoid overwatering. It can help to water just a little bit at a time, in a circle around the seedling, until it starts growing faster.

Big plant in a small container - when roots overgrow their container the plant is considered "root-bound"and the plant often shows symptoms of root problems. When this happens the plant needs to be transferred
into a larger container to stop the roots from being "choked."

Hydroponics - Root problems are caused when there's not enough oxygen in the water, usually caused because it's either too hot or there isn't enough bubbles/aeration.Certain strains are more prone to root problems than others, but good root practices will allow every
plant to thrive!

How to Treat Root Problems:

Step 1: Identify what may have caused the root problem (refer to list of possible triggers above)

Step 2: Address this underlying issue

Happy temps - Make sure your grow area maintains a comfortable room temperature during the day, and is a few degrees cooler at night. Learn more about how temperature affects your cannabis plants.
Only water your plants when they need it. How often should I water my potted cannabis plants?

Make sure potted plants have plenty of drainage, and there must be drainage holes at the bottom.If soil or growing medium holds a lot of water, consider mixing in 1/3 to 1/2 extra perlite to "loosen
things up" and improve drainage at the roots.
Put plants in the right sized container to give the roots the best environment to spread out and grow.Brown, smelly roots? Learn how to get rid of root rot.

One important thing to note is that after you treat the cause of root problems, the old damaged leaves may never recover! With recovery, you should be looking for the problem to stop spreading, and for new
leaves to be growing in green and healthy.

Enough of all the pics with sad or unhappy roots - before you go, here's a picture of healthy roots growing from a new clone!
Screenshot_9.png


Leaf Color:
Edges Appear Brown or Burnt
Pale Color Leaves
Yellow Leaves - New Growth
Yellow Leaves - Lower, older leaves
Yellowing Between Veins
Veins of Leaves Stay Green
Red or Pink Color on Leaves
Brown or Dark Spots
Leaf Symptoms:
Yellowing Between Veins
Veins of Leaves Stay Green
Spots
Old Leaves Dropping Off
Slow Growth
Abnormal Growth
Leaves Curl Under
Leaves Curl Upwards
Wilting / Drooping
Plant Symptoms:
Old Leaves Dropping Off
Slow Growth
Twisted Growth
Leaves Curl Under
Leaves Curl Upwards
Plant Wilting / Drooping
Root Symptoms:
Brown
Smelly
Mushy
Slow Growing
 

L0oD

Form
Poznanik Foruma
09.03.2015
5.686
20.015
398
Planeta Zemlja
www.vutra.org
Spider Mites


Spider mites are part of the mite family and are related to spiders, ticks and other mites.Although they're a common cannabis pest, they can be very difficult to get rid of.

First Sign of Spider Mite Damage - Tiny Specks (Bite Marks) On Leaves
Screenshot_1.png
Picture of spider mites on a cannabis leaf - they're tiny and often found under the leaves.
Screenshot_2.png

Learn how to get rid of spider mites for good - this pest can be a marijuana grower's worst nightmare!

Table of Contents

What Are Spider Mites?
How To Get Rid of Spider Mites
Step 1: Kill Them!
Step 2: Follow Up Again in 2-3 Days
Step 3: Repeat If Necessary
Step 4: Protect Your Plants
Indoor Spider Mite Prevention
Outdoor Spider Mite Prevention

Spider Mites and Cannabis


Spider mites have tiny sharp mouths that pierce individual plant cells and suck out the contents.This is what results in the tiny yellow, orange or white speckles you see on your plant leaves.
Screenshot_3.png
Spider mites are common cannabis pests, especially when growing in soil. Although less common in hydroponics, spider mites can show up in any setup where cannabis is being cultivated!

Villains! Extreme Close-Up of Two-Spotted Spider Mites with Egg
Screenshot_4.png


Spider mites can be an especially tricky pest in the grow room. Since they are so small they can build up a big infestation before a grower even notices a single mite.
Many growers see the distinctive tiny spots of a spider mite infestation and think it's some sort of nutrient deficiency, not realizing it's actually something far more sinister.
Screenshot_5.png
Spider mites are despised by growers. Here's why...

Rapid reproduction - a single mature female spider mite can produce a million mites in less than a month.Disappearing act - spider mites often appear to be gone/killed, then they come back with a vengeance days
or weeks later, right when you thought you'd gotten rid of them for good.Big appetites - spider mites can eat up your tender plants in an amazingly short amount of time; a bad infestation has been known to kill plants overnight.

Webbing - spider mites cover leaves and buds with a fine mesh of silk webbing, ruining whole crops even after you get rid of the spider mites.
Zombie-like resistance - spider mites quickly become immune to whatever you do to try to kill them;if you don't take care of your spider mite problem by eradicating them completely from your grow room,
you may soon find you have a population of 'Super-mites'. The two-spotted spider mite which specializes in
cannabis seems to be particularly resistant to insecticides, and is sometimes referred to as "the borg"in the cannabis growing community. These 'borg' spider mites with two spots on their back can be almost impossible to get rid of! Read somthing to get rid of the "borg" spider mites in grow room.

Spider mites often go unnoticed at first because they are so tiny that they look like spots to the naked eye. Male spider mites are about 1/50th of an inch long (.5mm) while females are slightly smaller at
about 1/64" (.4mm). It's hard to imagine something that tiny, but the picture below might help give you an idea of how small they are:
Screenshot_6.png

Under a microscope you can see they have four pairs of legs, no antennae and a body shaped like an oval.
Screenshot_7.png
Image courtesy of University of Florida Entomology & Nematology Dept.


When spider mites attack a particular spot and you see lots of speckles near each other, the leaves may start looking yellow or bronzed. Badly attacked leaves often die prematurely.

Although it starts with speckles, this pest has certainly earned the "spider" part of its name from the distinctive silk webbing they spin on vegetation, leaves and flowers once an infestation really sets in.
Web-producing spider mites may completely coat the foliage and flowers with the fine silk, which collects dust and looks dirty.
Screenshot_8.png

With flowering plants, you may even see entire buds get covered in fine webbing from a bad spider mite infestation.
Screenshot_9.png

Spider mites have a life cycle that helps them re-populate quickly and effectively after much of their population has been destroyed.

Adult females begin the cycle by laying eggs, often on their host plants. In days or weeks an egg will hatch and become a larva, which is the first stage of life. Larvae are round bodied and have only three
pairs of legs. The larvae feed for a few days, seek a sheltered spot to rest and then molt into the first nymphal stage. The first nymph now has four pairs of legs.

The first nymphs feed a few days, rest and molt into the second nymph. The second nymphs feed, rest and molt into the adult stage. Overall, it can take days or weeks for spider mites to go through their whole
life cycle.

Here are adult spider mites with eggs
Screenshot_10.png
Image courtesy of Natalie Hummel, Louisiana State University AgCenter, Bugwood.org


Because of this variable growth process, it's common to think that you've eradicated the spider mites in your grow room while they're secretly building up numbers in one of their immature stages.

This is why it's so important to keep treating your grow room after a spider mite infestation even if it appears that all the spider mites are gone. Just pretend they're hiding and doing pushups, just building
up their numbers for a second infestation. Treat your grow room like a war zone, and don't allow the spider mites to build up any numbers and attack again!

Growers Need to Take Spider Mites Seriously... Or This Can Happen!
Screenshot_11.png


Solution: Early detection of spider mites is key!

Spider mites are tiny and can be detected only by a full and thorough leaf inspection(on both sides of the leaf). If you find Spider Mites or eggs you must act fast and hit them hard.

Spider mites can be very quick to take over your plant, and even quicker to develop a resistance to almost any method you use to get rid of them, which is why it's generally recommended to use multiple methods of
offense against a spider mite infestation.

If you have problems with spider mites, keep a constant and varied offense for the best chance at success.

It can help to identify how/where you got spider mites...

If you already have an infestation, you will immediately want to start hitting them hard with something that will kill them on contact (several options are listed below). But....
Screenshot_12.png

First, what type of spider mite do you have?

Tracked in from outside

Vegetable garden

Animals/pets

From a plant besides marijuana

If you have some spider mites which got tracked in randomly from outside, it's likely you've got a run-of-the-mill spider mite that should be easy to get rid of.
Although these guys are annoying as well, they almost seem nice compared to their cannabis-specialized counterparts.
Chances are you'll be able to successfully use one of the less harsh home remedies to stop your infestation.
From another marijuana garden
Clones were infested with spider mites
Tracked spider mites in from another marijuana garden
Any time the spider mites were living on another marijuana plant before they got to your plants
If you got your spider mites from a cannabis clone or plant from another cannabis grower, chances are
you've got the type of spider mite that is an expert at infesting cannabis plants.

The (often two-spotted) mites often seem to be the worst spider mite in this category!

These specialized spider mites are incredibly developed at living on marijuana plants, and may already be immune to many common spider mite remedies.
If you believe you got your spider mites from another marijuana grower, then don't play games.
Get serious and get rid of your mites NOW, before they adapt to your grow room and become unstoppable.

How To Get Rid of a Spider Mite Infestation

Step 1: Kill Them!

Step 2: Follow Up Again in 2-3 Days

Step 3: Repeat if Necessary

Step 4: Protect Your Plants


Step 1: Kill Every Spider Mite You Can

Shake the plant, then kill the spider mites with something that kills them on contact, like...

Proven Spider Mite Remedies
(from serious chemical pesticides to organic repellents to home remedies)

Azamax is a time-tested way to rid your grow room of spider mites. Spray plants 15 minutes before lights out, making sure to drench the foliage under the leaves as well as the top of your soil. You may want to
use a spray bottle or mister. Use a fan to blow on your leaves to help things dry. Treat your room more than once, even if you believe the spider mites are gone. You can also add small amounts of Azamax when watering your plants, as it will not hurt your roots but will kill spider mites in the soil.

Spinosad Products (safe & organic) - Spinosad products are organic and unlike many other spider mite pesticides, completely harmless to pets, children, and plants. Unlike many insecticides, you can spray
spinosad heavily on leaves and roots with basically no negative effects. Spinosad products can be used directly to kill spider mites on contact, but can also be used when watering plants to systematically kill
spider mites via the roots. Spinosad can also be effective at fighting caterpillars, thrips, and many other marijuana pests.

Can be used both as a topical spray like Azamax and Mighty Wash, and can also be used directly at the roots.Spinosad is an organic insecticide made from the fermentation of a specific soil bacteria
(actinomycete Saccharopolyspora spinosa) and kills spider mites via ingestion or contact by effecting the insect's nervous system. Spinosad can be a good choice for organic and outdoor growers, because it is very
toxic to spider mites, but is less toxic to many beneficial arthropods.

Note: Most spinosad products are effective for only about 24 hours after being mixed with water,so only mix as much as you will need per application. Anything left over will be waste. You will want to
use a spray bottle or mister.
Doktor Doom Spider Mite Knockout Spray - This spray is hard on spider mites, but the main ingredient
Pyrethrum can also be hard on plants, especially in tight spaces without much ventilation, so keep it as a last resort if possible. Use with extreme care around humans as the ingredients can be toxic. Never use
Pyrethrum-based products on your plants while your grow lights are on as it can burn your plants.Avoid using Pyrethrum products on young or sensitive plants as they can get burned even when the lights
are left off.

Do cover your grow lights and vents when bombing your plants with Pyrethrum and make sure you give the area at least 24 hours to air out before you try to breathe the air. This spray can work well for a couple
of plants, but you'll want a Pyrethrum fogger if you have a lot of plants to treat. Outdoors,Pyrethrum can kill beneficial insects too, so keep that in mind if you're using natural predators to control pests (like ladybugs). All that being said, this spray will work to get rid of most spider mites,and it kills them on contact. Pyrethrum kills spider mites but not their eggs, so this product usually needs to be used 2-4 times (once every 2-3 days) to stop the breeding cycle and get rid of the toughest infestations.

NoPest Strips - these emit a vapor that kills spider mites, but do NOT use these if you will be breathing air from your grow room as the vapor they give off is toxic to humans and other mammals. These are only
suitable if you're growing somewhere that is NOT your living space, but can be an effective way to get rid of spider mites.

Bleach solution (1 tablespoon of bleach to 1 gallon of 95°F, pH balanced, water in a spray bottle or mister)- make sure to clean all surfaces of your room, and bleach them too if possible.

Alcohol and Water mixed together will also kill the bugs on contact and shouldn't hurt the plant as long as the solution contains at least 40% water. You will want to use a spray bottle or mister.

SM-90 mixed with water (1 part SM-90 to 5 parts water) kills spider mites on contact and is organic(it even smells good!). You will need a mister to get nice even coverage on all the leaves with SM-90.

Neem Oil works in a similar way to SM-90, though Neem oil doesn't smell as nice and will leave an unpleasant taste/smell on buds when used to treat flowering plants. There's some evidence Neem oil may be
harmful to humans so use with care! Just as with SM-90, you will need a mister to get all the leaves evenly,especially since neem oil and water will separate easily.

Homemade Pepper Spray (or buy Hot Pepper Wax Spray) - make at home by mixing 9 parts water, 1 part additive-free dishwashing soap, and one tablespoon of cayenne pepper. Treat the top and bottom of all
leaves, as well as mist the soil. This treatment is very effective against some types of spider mites, but is ineffective against other types. If making your own pepper spray, you will want a mister.

Nicotine tea - hit or miss like pepper spray, but can be very effective against certain types of spider mites. Take 15 gram of organic tobacco and steep it in hot water overnight to make nicotine tea. You can
also add a little bit of Safer Soap. Use like any other spider mite spray. You will want a mister.

Insect predators - there are also insect predators such as lady bugs and predatory mites that can provide some control and reduce your spider mite numbers, but it is unlikely these will get rid of your spider
mites on their own. Insect predators can be effective if you have a small problem or if you need to get to harvest and chemical sprays are not a good option.

Diatomaceous Earth - Basically, this is fossil dust - sprinkle on the top of your soil, and anywhere else in your room (window sills, doorways, etc). This powder-like substance is harmless to mammals and plants,
but is incredibly sharp at the microscopic level. Therefore it will tear and dehydrate spider mites on physical contact. This will not get rid of an infestation, but can help control and slow things down when
used effectively.

Treat Entire Grow Area With Insecticide - Treat complete room with broad spectrum insecticide (only do this for a really bad problem, or one that keeps coming back) - avoid this if you can!

Note: Many growers try to avoid chemical sprays or miticides which contain Abamectin or lindane because these are harmful to humans. Please take a look at anything you use to treat your grow room, follow the directions closely, and heed all warnings. Some treatments will work for some setups or types of mites,but not for others. As mentioned earlier, if you got your spider mites from another marijuana grower,
chances are you may need to resort to extreme measures to get rid of your infestation.

Step 2: Follow up in 2-3 days with a different method to kill them
(you should also re-apply your first method)

Follow up in 2-3 days with something different that will also kill their eggs and any surviving adults.The adults at this point will already be more resistant to your original method so you'll get the best
results using something else for the second treatment.

Step 3: Repeat Step 1 & 2 at least one more time - always treat grow area at least once after you think spider mites are completely gone

Repeat steps 1 & 2 at least one more time to ensure that you have really cleaned out your grow room.Some species of spider mite can take days or weeks to mature and will reappear in the grow room stronger
than ever. Because of this, you should treat your area at least once after you are almost certain all the spider mites are gone.

Using a mix of several different methods seems to work best for getting rid of spider mites. Some spider mites are more resistant to some methods than others.

If you can see spider mites with your eyes, it means you probably have millions in the room waiting to hatch.


Step 4: Prevention: thoroughly inspect and proof your grow area against future attacks.
Once spider mites are gone, you need to worry about prevention.
With spider mites, the best offense is a good defense! Stop spider mites from ever getting hold of your grow room with good prevention....

Indoor Spider Mite Prevention

The best spider mite remedy is prevention!

If you've had spider mite attack your grow room in the past, you might be unintentionally doing something to encourage or attract them.

There are many preventative products such as sprays or SM-90 which make plants less tasty to annoying spider mites. However, these should only be used as a supplement to good gardening practices.

The most important aspect of spider mite (or any marijuana pest) prevention when growing indoors is a clean and secure grow room.

Never Bring Spider Mites into Your Grow Room!

Many indoor growers get spider mites from bringing in cannabis clones that are infected, or from visiting another grower or grow room with spider mites. Even just a few eggs on a clone or a few spider
mites on your clothes is all it takes to start a full fledged infestation. This is the most common way people get spider mites, especially the marijuana-specialist spider mites ("the borg") which can be
almost impossible to kill!
Screenshot_13.png
Most importantly, never move plants or clones from the outside world into your grow room without treating and quarantining them. If you get a new plant, keep that plant away from your other plants until you know that it's clean.

For every new plant or clone:

Get a handheld microscope and use it to look for bugs on new plants. Check closely for tiny spots on the leaves which could be spider mite bites. Also check for eggs and tiny bugs underneath the leaves. It's
easiest to find bugs when the plant is at its smallest.
Dip new clones or small plants in room temperature water treated with Safer Soap, Mighty Wash or SM-90. If you can't dip the plant, spray with a proven spider mite cure.Keep new plants in quarantine for at least a week and check regularly to ensure they have no bugs
before you bring them around your other plants.
Never go directly into the grow room from outdoors to avoid tracking in bugs. If you've visited another grower or grow room, it's especially important to change your clothes and possibly shower before going to
check on your plants. You don't want to infect your plants with spider mites that are cannabis specialists!One of the cool things about growing with seeds is you never have to worry that they come with bugs!

Keep a Clean Grow Space

Try to keep everything clean and tidy. Not only does this help prevent bugs but it protects buds so they don't have fibers and dust all over them!

Collect any dead leaves or other plant matter regularly and remove them from your growing space.It doesn't count if you put them in a neat pile or trash can in the corner, you need to keep dead
plant matter out of your grow room.
Make sure that you or anyone who comes into your contact space is clean (don't let anyone walk into your grow room directly from outside). Be especially cautious if the person has recently visited another
grow space.
No dogs, cats, rabbits or any other pets in your grow space. In addition to shedding and possibly bringing in bugs, some cats will happily chew on your leaves and buds, so double reason not to let them
anywhere near your plants! Wipe up and sterilize everything in between grows.


Maintain a Great Growing Environment

Spider mites do better in some environments than others. Luckily the conditions that make your plants happy are not that great for spider mites. So if you're taking care of your plant's environment,
you're also helping to prevent bugs and mold...........
 
  • Sviđa mi se
Reactions: Peroooooo

L0oD

Form
Poznanik Foruma
09.03.2015
5.686
20.015
398
Planeta Zemlja
www.vutra.org
....Make sure you have great airflow in your room because spider mites thrive in stagnant air. Creating lots of air movement will not only help prevent spider mites, fungus gnats and mold, but your plants love it too!
Spider mites like hot, dry weather. Maintaining a comfortable room temperature and a moderate amount of humidity in the grow room will help prevent or slow down a spider mite infestation.If you have an air
intake from outside, make sure you have some sort of filter to keep bugs from getting in Sprinkle Diatomaceous Earth on top of your soil and all around your grow room - this all-natural remedy is safe for humans (we can even eat it), and works because it is very jagged on the microscopic level.Tiny spider mites get ripped apart by diatomaceous earth while plants grow through it happily.Keep a close watch on your plants, and react quickly at the FIRST site of spider mites!!!!

If you're growing just a small amount of marijuana for personal use and are really worried about spider mites, you might consider starting with seeds instead of clones. That way you don't have to worry
about accidentally getting cannabis zombie mites when starting from seed (plus you can choose to grow any strain you want!). Another way to help prevent some pests is to grow hydroponically, since spider mites
and most pests are much less likely to thrive in a soilless environment!


Outdoor Spider Mite Prevention

If you have a spider mite problem outdoors, you will want to...

Don't Bring Infected Plants Into Your Garden

For every new cannabis plant or clone:

Use a handheld microscope to look for bugs on any new plants. Check closely for tiny spots on the leaves which could be spider mite bites. Also check for eggs and tiny bugs underneath the leaves.
Dip new clones or small plants in room temperature water treated with Safer Soap, Mighty Wash or SM-90.If you can't dip the plant, spray with a proven spider mite cure.Keep new plants in quarantine for at
least a week and check regularly to ensure they have no bugs before you bring them around your other plants.If you've visited another cannabis grower, grow room or outdoor garden, it's especially important to change your clothes and possibly shower before checking on your plants. You don't want to infect your plants with spider mites that are already specialized in infecting cannabis plants!

Don't Kill Beneficial Insects

A healthy population of predatory insects like lady bugs will help kill off pests including spider mites.The "Western Predatory Mite" is another great defense against spider mites since they specialize
in killing mites.Only use pesticides if you actually need them and avoid using broad-spectrum pesticides that kill lots of bugs indiscriminately. Instead, try to use narrow-spectrum pesticides that are meant to
kill just the bugs you're trying to get rid of. So for example if you have caterpillars, use something that mostly kills just caterpillars (like BT Spray which pretty much only kills things like caterpillars
and fungus gnats) instead of using a pesticide that kills all kinds of bugs including caterpillars. It will not only work better to get rid of the specific pest you're having trouble with, but it also prevents you from possibly killing some predatory insects that may be protecting your garden.

Don't Kill Lady Bug Babies! These Are Beneficial to Your Garden!
Screenshot_14.png

They Look Gross But They're Already Eating Bad Bugs!

Give Your Plants a Great Growing Environment

Make sure you have proper ground cover (cover your soil with a soil cover, weed barrier fabric,Diatomaceous Earth, or some other barrier). Basically, you want to prevent anything from being able to
live or grow in the soil near your plants.Make sure your plants are growing in a breezy area that doesn't get too hot - spider mites
love hot weather and stagnant air. In addition to attracting pests, stagnant air can also trigger different types of mold, especially in the flowering stage! Keep a close watch on your plants, and react quickly at the FIRST site of spider mites!!!!
Don't Kill Lady Bug Babies! These Are Beneficial to Your Garden!


Leaf Color:
Pale Color Leaves
Yellow Leaves - Lower, older leaves
Yellowing Between Veins
Brown or Dark Spots
Mottling / Mosaic Pattern
Leaf Symptoms:
Upper Leaves / Newer Growth Affected
Lower Leaves / Older Growth Affected
All Leaves Seem Affected
Yellowing Between Veins
Spots
Mottling / Mosaic
Slow Growth
Abnormal Growth
Wilting / Drooping
Webbing on leaves
Plant Symptoms:
Slow Growth
Plant Wilting / Drooping
Other Symptoms:
Webbing
Bugs
Buds Not Fattening
 

L0oD

Form
Poznanik Foruma
09.03.2015
5.686
20.015
398
Planeta Zemlja
www.vutra.org
White Powdery Mildew


White spots on your leaves? Leaves dusted with round patches of powder that looks like flour?

It could be White Powdery Mildew, also known as White Powdery Mold or just "WPM" to cannabis growers.
WPM is usually a minor annoyance that's easily fixed, but if you don't catch it early, white powdery mold can turn into a relative catastrophe that ruins an entire marijuana harvest!
Screenshot_1.png
Never experienced it?

Imagine circular patches of a living, breathing, fuzzy, flour-looking substance showing up on your plant’s leaves without any warning. From there, the mildew can easily spread to other leaves and buds, rendering the buds unusable.
White Powdery Mildew has such an easy time spreading that even careful growers who take proper precautions can still experience it.
For example, the picture is what I found on one of the leaves of MY plants the week before I wrote this! Screenshot_2.png

Luckily, the issue was easily resolved because it was caught early, and because White Powdery Mildew is completely reversible up to a point.
This week, we will arm you with the information to stop this fungus’ proliferation before it even has a chance to take hold!

What IS White Powdery Mildew? Screenshot_3.png

White Powdery Mildew is a rapidly reproducing (both sexually AND asexually) fungus who only knows how to do two things:

Eat your plants

Make more White Powdery Mildew

Fortunately, White Powdery Mildew is easy to spot since the white patches of fungal growth it creates stand out against cannabis’ green leaves. It can be removed from plants with proper treatment if spotted early on, but any buds with WPM should be discarded as they most likely contain many more spores than your eye can see.

What causes White Powdery Mildew?

High Humidity

WPM needs moisture to thrive, but that doesn’t necessarily mean it needs water. Having a grow area with high humidity is all WPM needs to grow. This seems to be a bit problematic since young cannabis plants
grow best in relatively humid environments (40% -60% RH). Luckily, high humidity usually only becomes an issue when it’s combined with the next cause (low/no airflow).
People who live in environments with extremely high humidity (such as Florida and the UK) can purchase a dehumidifier to control humidity in the grow area. This is especially important during the flowering phase
when humidity needs to be much lower (45% rh) to prevent rampant growth of WPM and bud mold.

Low/No Airflow

White Powdery Mildew has a hard time settling in a grow room where the air is being moved. High humidity will give WPM the conditions it needs to survive, but poor airflow is what gives it the ability to settle
down in the first place. In fact, a small (preferably oscillating) fan moving air in a grow area will prevent the vast majority of White Powdery Mildew woes.

Poor Ventilation

If you have WPM spores in your grow area and the air in grow area is never exchanged for fresh air, the spores get multiple chances to land on your plants and reproduce. This happens most often in conditions
where cannabis is being grown in a closed, unventilated space - such as a closet - and precautions aren’t taken to exchange old stale air for new fresh air.

Leaf-Leaf Contact

Leaves that are touching each other will form moisture between them, and thus they become more likely to contract WPM. Untrained bushy/leafy plants with lots of new vegetative growth are especially prone since plants will often have leaves mashed up against each other as they try to reach the light. Screenshot_4.png


Advanced growers can defoliate some of the fan leaves that are completely shaded from the grow light to make fewer choice landing spots for White Powdery Mildew. Also, defoliation frees up energy for the plant to use when done correctly and increases yields! Screenshot_5.png

How to Eliminate White Powdery Mildew

As I mentioned earlier, I recently had a battle with White Powdery Mildew. Rather, it might have been a battle if I noticed it later or waited to fix the problem. That’s the one good thing about WPM: in most
cases when WPM is caught early, you can remove all traces of the mildew without harming your plants.

There are quite a few products and homemade concoctions people use to treat WPM. Among the effective treatments are:

Milk (1:9 ratio of milk to water)

Baking soda (2 tablespoons per gallon of water)

Neem Oil (4 teaspoons per gallon of water)

Hydrogen Peroxide (1 teaspoon per gallon of 35% H202)

SM-90 (1:5 ratio of SM-90 to water)

Rather than go into these methods, I’m going to give you the simple strategy I use that gets rid of White Powdery Mildew on the first try, every time! Here’s my trusted 3-Step White Powdery Mold cure:

Remove White Powdery Mildew from leaves - Get some water (tap water works fine) and some paper towels.Wet the paper towels and use them to gently wipe the mildew off the affected leaves whilst being careful not to jostle any leaves with spores on them.
Screenshot_7.png

Using a wet cloth will ensure that more spores stick to the cloth instead of becoming airborne.
Note: While it isn’t necessary to use paper towels, their disposability helps to curb the spread of spores from one leaf to another.

Ensure plants have proper airflow and ventilation - Even if you have absolutely no airflow or ventilation in your grow room, having even two fans will drastically reduce your chances of encountering WPM while also benefitting your plants overall health. One fan should be oscillating if possible and should gently blow air over your plants. All the plants need is enough air to gently rustle their leaves. The second fan
should be in your grow room pointing outward, pulling heat away from your plants (only needed if you have no ventilation). Having a fan pointing out of your grow room will force old air out of the room, and in turn, pull new air into the room. At this point, you’ll have new air coming in, being used and circulated,then kicked out. Keep in mind that two fans is a minimum.

There you have it. If you end up running into White Powdery Mildew, give this advice a shot and you won’t have to deal with it past that first day. If you do end up using these steps, feel free to let us know if
it helped you or not, or how you did it differently. When growers know just a little bit about this disease,it doesn’t have a chance!

White Powdery Mildew Defense

What's the easiest way to fight against White Powdery Mildew?

Have it completely outgunned!

Get the right stuff to let White Powdery Mildew know that your grow room is off limits!


Leaf Color:
Pale Color Leaves
Patches of white powder on leaves
Leaf Symptoms:
Upper Leaves / Newer Growth Affected
Lower Leaves / Older Growth Affected
Patches of white powder on leaves
Spots
Mottling / Mosaic
Wilting / Drooping
Other Symptoms:
Mold
 

L0oD

Form
Poznanik Foruma
09.03.2015
5.686
20.015
398
Planeta Zemlja
www.vutra.org
Fungus Gnats


Cannabis Fungus Gnat Cheat Sheet

Fungus gnats start buzzing around cannabis plants when the topsoil stays wet for too long.

Introduction

Fungus gnats - how do you get rid of these tiny flying pests that lay eggs in your soil?This article will teach cannabis growers (like you) exactly that: how to completely eradicate fungus gnats
and ensure they never come back!
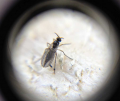
Fungus gnats are a common problem for soil cannabis growers (especially those who overwater their plants!),but they're actually easy to get rid of once you know what to do!Fungus gnats (also known as “sciarid flies”) are black or dark brown flies which look like tiny mosquitoes with dark wings.

How Big Is a Fungus Gnat?

Fungus gnats are small, only about 2 mm long. To give you an idea of how big that is, 2mm is about the thickness of a quarter. Screenshot_1.png

Despite their small size, fungus gnats can be a big nuisance in your soil cannabis grow, mostly because their tiny maggot/larvae offspring will hurt your plants roots (which will cause problems for your plants).

What Causes Fungus Gnats to Attack Cannabis Plants?

Fungus gnat larvae eat fungus or decaying matter, and need wet conditions to thrive. It is common for soil growers to overwater their cannabis plants, and wet soil is the perfect home for fungus and decaying organic matter. After fungus has grown (often invisible to the naked eye) or overwatered matter has begun to decay in the topsoil, fungus gnat lays their eggs in in the top layer of wet soil.

Warm + wet topsoil = fungus gnats (and other problems or pests in soil)

These eggs hatch into larvae that look like tiny maggots which only live in the top 2-3 inches(5-8 cm) of soil. The fungus gnat larvae are the culprits which cause damage to cannabis roots.

Cannabis roots are not the main source of food for fungus gnat larvae, but roots get caught in the crossfire. Although the main diet of fungus gnats is fungus and decaying matter, the larvae happily
gnaw on root hairs and young tender roots of cannabis plants.The damage to the roots from these little suckers cause problems in the leaves and slowed growth. A bad fungus gnat infestation can even kill
cannabis plants, especially young seedlings.

While the main problem is that fungus gnat larvae attack the roots of your cannabis plants, the adult fungus gnats can also spread diseases (such as pythium - a common cause of root rot) via their feet.

Because of these problems, it is important to get rid of a fungus gnat infestation right away.

If fungus gnats need fungus and decaying matter to survive, where is the fungus coming from?
Fungus grows in wet conditions and is an essential part of the environment (where it breaks down organic matter like dead leaves). Fungus spores are around us everywehere pretty much all the time, but these spores will never start growing without moisture. Warm and wet conditions in the soil of a cannabis grow are what cause fungus to grow and matter to decay. Sometimes you won't even be able to see the fungus or decaying matter with the naked eye. But once the conditions are right, fungus gnats thrive in the top layer of you soil whether you can see fungus or not. Screenshot_2.png
Check To Make Sure You Have Fungus Gnats

1.) Tiny flying black bugs around your plants & crawling on your soil.

Even if your plant or leaves aren't showing symptoms or distress yet, if you see fungus gnats it means that you have a problem with fungus and moisture in your soil. Don't let the infestation get out of hand.
It’s always recommended to get rid of any pests in the grow room as soon as you know they’re there!

The adult fungus gnat flies are just annoying (and gross); they don't bite you, and don't do much to hurt your plants directly besides spreading disease. But even though the mature fungus gnats aren't a huge threat to your plants, the presence of adult gnats lets you know that your cannabis soil has been infested with their maggot offspring which causes the real problems.

2.) Tiny white or translucent larvae with black heads in the soil

Note: this picture is really big so you can see what you're looking for, but the actual larvae / maggots are TINY. If you spot them, you'll just see tiny white spots wriggling around in the topsoil.
Screenshot_3.png
It’s the fungus gnat larvae in the soil that damage your plant roots and cause growing problems,especially to seedlings or young plants.

How Fungus Gnat Larvae Cause Damage to Cannabis Plants

Larvae attack tender new plant roots and root hairs, which cause these problems:
“Damping off” - seeds or seedlings are weak for no apparent reason; sometimes stems weaken and seedlings can even just fall over and die.If the fungus gnat infestation gets out of hand, even adult cannabis plants
start looking unhealthy, showing many symptoms such as wilting, yellowing, drooping, spots. Cannabis leaves may show signs of nutrient deficiency (or deficiencies) which seem to be unrelated to pH,
nutrients, or any other identifiable nutrient problem.
Plants will start growing slowly and may even stop growing altogether.
If the infestation hits in the flowering stage, yields can be reduced.

Fungus Gnats vs Fruit Flies

Quick Check! Make sure you have fungus gnats and not fruit flies.

Fruit flies are brown/yellow/orange while fungus gnats are dark brown or black. Fruit flies tend to be bigger/fatter and easier to see than tiny fungus gnats. You need to take a slightly different approach
with fruit flies. Screenshot_4.png
Fruit flies will keep coming back if there’s ripe or rotting fruit to eat. If you've ever left a banana or other fruit on your counter too long, you've probably noticed how fruit flies seem to be able to appear out of thin air if there’s ripe fruit around.

Fruit flies can start buzzing around poorly composted soil which contains kitchen scraps, but otherwise fruit flies are uncommon in the grow room unless there’s ripe/rotting fruit or other tasty bits for them
to eat.

So once you get rid of their food, the fruit flies will disappear.

Pics of Damage to Cannabis Plants From Fungus Gnats

A fungus gnat infestation on your cannabis plants can cause all sorts of strange problems - often they look like overwatering, pH problems or nutrient deficiencies. The more fungus gnats you have, the more
likely you'll see damaged leaves and reduced growth rates.

Since fungus gnats are almost always caused by overwatering and too-wet topsoil conditions, some of these symptoms may actually be caused by too-wet soil. In any case, when you see fungus gnats, it means there's a problem in your setup that needs to be addressed.
Screenshot_5.png Screenshot_6.png
Screenshot_7.png
Screenshot_8.png Screenshot_9.png

Here's a flowering cannabis plant affected by fungus gnats! Screenshot_10.png
What To Do If You Have Fungus Gnats in Your Soil

Most importantly, don’t overwater your plants! Never water cannabis plants grown in soil until the top inch of soil feels dry (up to your first knuckle). Fungus gnats need wet topsoil conditions to grow and
thrive. The most common reason growers get fungus gnats is overwatering their plants.

Get Rid Of Fungus Gnats Quickly: What You Need

Yellow Sticky Cards
A larvae-killing product with bacillus thuringiensis bacteria
A fan to blow air over the top of your soil
(Optional, but recommended) Diatomaceous earth - food grade

1.) Place yellow sticky cards in the grow area - fungus gnats love the color yellow and will fly towards it.
These yellow sticky cards (found at most gardening stores) are covered with a glue that will trap adult fungus gnats, bringing down their numbers.

But the most important reason to use yellow sticky cards is to help you keep track of how bad the current fungus gnat infestation is. As the infestation is reduced, there will be less adults caught in the yellow
sticky traps. That's how you know that your approach is working.
Screenshot_11.png Screenshot_12.png

2.) Get a fan blowing air over the top of the growing medium. This helps dry out the top layer of your soil, and also helps prevent the fungus gnats from being able to fly around and lay more eggs. Screenshot_13.png
2b.) (Optional, but recommended) Sprinkle food-grade diatomaceous earth over exposed parts of soil.
This will help kill the fungus gnat larvae and will also help prevent infestations in the future.
While not completely necessary, adding diatomaceous earthis a great step to take to help get rid of the fungus gnats and their larvae as fast as possible.

Diatomaceous earth is an organic insect killer made of fossilized shells. It is sharp on the microscopic level and works by puncturing the exoskeleton of insects (draining them of their body fluids),
but poses no harm to humans or pets and can even be eaten. Screenshot_14.png

3.) Don’t water your plants for a few days. You want to begin drying out the soil to kill as many larvae as you can before you apply a treatment (which will involve watering). Fungus gnat larvae need a warm,wet environment near the surface of your soil to grow. Even after you’ve gone through all these steps and believe fungus gnats are gone, make sure to avoid overwatering plants, as this is the most common reason growers get fungus gnats in the first place. Don't do the next step until the top few inches of soil has dried out.

Learn about other natural ways to kill Fungus Gnat larvae

5.) Avoid overwatering your cannabis plants from now on. Never water your cannabis plants in soil until the top inch or two of soil has dried out. From now on, you don't want to ever let the top part of soil
stay wet to create a breeding ground for fungus and fungus gnats.

6.) Keep your sticky yellow cards up until Fungus Gnats are completely gone. These yellow sticky cards will continue killing adult gnats. They're also helpful because they will alert you to whether fungus gnat
numbers are rising or falling. Even after killing all the larvae, it may take a few days to a few weeks before the adult fungus gnats are completely gone and you stop seeing new gnats caught on your sticky cards. Screenshot_15.png

What is bacillus thuringiensis?

This type of bacteria produces a toxin that hurts the larvae of fungus gnats and prevents them from being able to eat. Bacillus thuringiensis will not affect your plants or roots in any other way. Products that
contain this bacteria are sometimes listed as “BT” or “BTi.” It is also safe for fish, pets, humans and pretty much everything besides larvae. It is safe for organic grows, even in the middle of the flowering/budding stage, and won’t hurt other microbes living in the soil.

When using pellet-type formulations of bacillus thuringiensis, you will get better results if you crush it up before sprinkling on soil. Powder and dry formulations of bacillus thuringiensis seem to work better
than liquid ones.

Other Ways to Kill Fungus Gnat Larvae

While bacillus thuringiensis is probably the best way to naturally kill fungus gnat larvae, you can use other biological control methods to kill these maggots. The following options will help control fungus gnat
infestations but will likely not completely get rid of them unless you stop overwatering your plants.

Growing Organic? The “brute force” methods above (SM-90 or Hydrogen Peroxide) will kill the fungus gnat
larvae, but will also kill many beneficial microbes in the soil. You can add beneficial microbes back, but it will take a while for them to repopulate your soil. This problem only really affects organic soil
growers. If you’re providing nutrients to your plants with bottled nutrients, you’re already providing nutrients in a way that your plants will be able to use even if the microbe populations are down. In any
case, if growing organically, an organic version of bacillus thuringiensis (subspecies israelensis) is the best option for getting rid of fungus gnats.
Screenshot_16.png

Prepare For Your Next Grow: Prevention

Before your next grow, make sure you thoroughly clean your growing area if you’ve been attacked by fungus gnats or other pests. Get rid of any houseplants that have any bugs flying around them. Never buy soil
that has already been infested with fungus gnats or show any signs of flying bugs or larvae/maggots.

Some growers will even cook new soil to make sure any fungus gnat larvae are dead before letting their cannabis plants or clones near it.

If you’re getting cannabis clones, make sure you get them from a trusted source and inspect closely for fungus gnats (as well as spider mites or other pests). You may want to start with seeds if you’re growing in soil and worried about bugs, as clones are the most common way to introduce pests to the grow room.

Speaking of cannabis clones... I know this article is about fungus gnats, but I want to mention something else that’s very important about cannabis clones. While fungus gnats are a big nuisance, they are not the
worst pests a grower can get from cannabis clones. Fungus gnat problems pale in comparison to the horrible affliction of getting cannabis-specific spidermites (aka “the borg”).

Once a grow room gets infected by the borg, it is incredibly difficult to get rid of these resilient pests which kill your plants, eat your leaves, and cover your plants (and buds) with horrible webbing.
Always check new cannabis clones thoroughly (including under leaves for bugs or eggs) before letting new clones anywhere near your grow area! You may want to dip new clones in spider mite killer to make sure
they are free of spider mites. Learn more about spider mites.

Some growers will start with cannabis seeds (as opposed to clones) to reduce the chance they ever have to deal with spider mites or fungus gnats!

Other Ways to Kill Fungus Gnat Larvae

While bacillus thuringiensis is probably the best way to naturally kill fungus gnat larvae, you can use other biological control methods to kill these maggots. The following options will help control fungus
gnat infestations but will likely not completely get rid of them unless you stop overwatering your plants.


Leaf Color:
Edges Appear Brown or Burnt
Pale Color Leaves
Yellow Leaves - New Growth
Yellowing Between Veins
Black or Gray Patches on Leaves
Brown or Dark Spots
Leaf Symptoms:
Upper Leaves / Newer Growth Affected
Small Inner Leaves Affected
All Leaves Seem Affected
Leaf Edges Appear Burnt
Yellowing Between Veins
Spots
Slow Growth
Twisted Growth
Abnormal Growth
Leaves Curl Under
Wilting / Drooping
Plant Symptoms:
Slow Growth
Twisted Growth
Leaves Curl Under
Plant Wilting / Drooping
Root Symptoms:
Slow Growing
Other Symptoms:
Bugs
Buds Not Fattening
 

L0oD

Form
Poznanik Foruma
09.03.2015
5.686
20.015
398
Planeta Zemlja
www.vutra.org
Hermies, Bananas & Male Plants


Table of Contents

Male vs Female: Why to Avoid Males, Hermies & Bananas
Accidental Pollination Can Be Caused By Different Types of Hermies...
"True" Hermaphrodite Plants
Bananas ("Nanners")
How to Avoid Causing Hermies or Bananas
Screenshot_1.png
Male vs Female Cannabis Plants: Introduction

Cannabis Life Stages and Gender

Did you know there are “male” and “female” cannabis plants? Yes, cannabis plants are “dioecious” plants,which means each plant shows a particular gender, just like humans and many animals. There will
occasionally be plants that show mixed gender and these plants are often referred to as hermaphrodites or“hermies”, which I will explain in much greater detail below.

The sex of a particular plant matters quite a bit to growers. That's because only female cannabis plants produce buds. In fact, the "buds" that we smoke are actually the female flowers of the cannabis plant.

The highest quality bud is considered to be "sensimilla" and refers to female cannabis buds that have not been pollinated by a male cannabis plant. The word "sensimilla" actually comes from the spanish phrase
"sin semilla" which roughly translates to "without seeds." Screenshot_2.png

Screenshot_3.png

Regular marijuana seeds will be about 50% male, and 50% female. That means half of the seeds will be unusable as far as growing buds. Please note that some male cannabis plants (about 70% of male cannabis
plants according to some tests) may produce a small amount of THC via trichomes growing on the outside of the plant. There is no way to know for sure if a particular male plant is going to produce THC, and even if it does it will be a much, much lower amount than a female cannabis plant producing buds.

If you have a male plant and you are trying to grow bud, I strongly, strongly recommend throwing the male plant away immediately and starting another seed or focusing on your other plants. It’s a waste of time to grow male plants for THC or other cannabinoids - they don’t grow buds!

Here's a picture of a male cannabis plant - no buds or trichomes, just pollen sacs! Screenshot_4.png


It’s impossible to look at a young cannabis plant and know its gender

For the first part of your cannabis plant’s life, it will be in the first stage of growth known as the“Vegetative Stage.” In this stage your plant will only grow leaves and stems, but no buds or flowers.
Think of this as the time when your plant is gaining size to prepare for the second stage of life.

There is no way to inspect a vegetative cannabis plant (like the following) and know the gender. Screenshot_5.png

Unfortunately, there currently is no way to determine for sure what gender a plant will be when it’s just a young seedling, and throughout most of the vegetative stage. In fact, scientists still don’t fully
understand exactly how gender is determined among gendered plants like cannabis. So far, no one has pinpointed a “male” chromosome or any other known factor that causes a plant to develop into a male or
female.

However, we do know that cuttings (clones) taken from a female plant will always turn out to be female.We also know that when you breed two female plants together, you end up with feminized (all-female) seeds.While we know that these methods are effective for growers, the exact mechanism of why and how this happens is not yet fully understood.

When do cannabis plants reveal their gender?

Cannabis plants reveal their gender when they reach their second stage of life, known as the “Flowering Stage”.

The first sign of gender almost always appears at the “V” where new growth tips form from a stem, like this….

So unless you start with a known female clone or feminized seeds, there’s no way to know what gender your plant will turn out until it actually starts showing signs of sex organs. This happens in the second stage of your plant’s life, known as the “flowering stage.” The first sex organs that appear are often called “pre-flowers.” Screenshot_6.png
See the little growths appearing at the "V" or "crotch" where the growth node meets the stem? These are the first sign of "pre-flowers". In this case, we can see the pre-flowers are forming, but it's not
certain whether this plant is going to turn into a boy or a girl quite yet.

Sometimes, when a plant is 6 weeks or older, or if the plant is a clone, it will begin to show pre-flowers while still in the vegetative stage. This is normal and is just a sign that your plant is fully mature and
ready to start flowering. On the other hand, some plants never show pre-flowers no matter how long you wait, so you don’t need to wait until your plant shows pre-flowers before you initiate flowering.

Younger plants (that are less than 6 weeks old) tend to take a few days longer to switch into the flowering stage compared to older, more mature plants that have been vegetating for a while. Other than
that you can pretty much force a plant to flower no matter what the age, even immediately from seed.

When Gender Isn’t As Certain... Avoid Accidental Pollination!

So now you know that most cannabis plants are normally considered to be either “male” and “female.” Yet sometimes you will run into plants that show both male and female characteristics, and these plant can
accidentally self-pollinate, or pollinate your other female plants.

A cannabis plant that shows both male and female parts is often referred to by growers as a hermaphrodite or “hermie.” These can pollinate your plants and cause seedy buds.

There are a few different types of mixed-gender plants, and it’s important for a grower to understand some of the biggest differences so they make the best decision possible when faced with hermis.

Important: It's not advisable to breed mixed gender plants to create seeds because their offspring could be more likely to display hermie characteristics.

Hermaphrodite Plants

Although growers will refer to all plants with gender problems as “hermies,” there are technically two different kinds, hermaphrodite cannabis plants, and mixed gender buds like buds with nanners. The only reason I bother to differentiate between the two is because true hermaphrodite plants are more predictable.

With a "true" hermaphrodite plant, the male and female parts will grow on different parts of the plant. They won't grow together in the same spot such as when nanners appear in the middle of buds.

Here is an examples of a true hermaphrodite plant - notice how this hermi has both female pistils and fully formed male pollen sacs.. Screenshot_7.png

What causes it? Stress can trigger this type of hermaphroditism, but unlike bananas, this particular type of mixed gender plant seems to be a little bit more based on the plant’s genetics. A clone of a true
hermaphrodite plant will often also turn into a hermaphrodite, and offspring will often show the same traits. It does not take much stress for these plants to hermie.

It is recommended to not breed a plant that shows hermaphrodite traits since this is a highly inheritable genetic trait. A good “breeding stock” mother will not show signs of hermaphroditism even when subjected
to stress. Screenshot_8.png

What should the grower do? It is recommended that you remove hermaphrodite plants from your grow room or
grow area as soon as possible to prevent accidental pollination of the buds.If pollen from a pollen sac is
allowed to make contact with your buds, those buds will stop focusing on making more buds and will turn all their “effort” into making seeds. No one wants seedy buds and reduced!

Unlike bananas, hermaphrodite plants tend to be more predictable. Though it's not advisable, a grower who watches very closely can carefully pluck all pollen sacs before they’ve burst and as long as the grower keeps close watch.
Remember, while these pollen sacs can start appearing early, they may continue to appear throughout the flowering stage so stay vigilant!
The following type of hermaphrodite plant has mixed male and female parts, referred to in botany as “bisexual” flowers.

With mixed gender buds you will see plants that grow a mix of pistils and pollen sacs together, like this...yields! Screenshot_9.png


Bananas (“Nanners”)

Another very common type of mixed gender buds is with the production of “bananas”(sometimes called “nanners”) which grow from the middle of female buds.

Example of a “Banana” or "Nanner" growing among buds.. Screenshot_10.png
Bananas are rarely round and they don’t look like a normal pollen sac. Instead they’re often elongated and yellow, giving them the nickname “banana”. They also often grow together in bunches that can look like a
bunch of bananas.

These can be a lot more difficult to control than actual pollen sacs, since they start pollinating everything in the area as soon as they appear. If you have a big banana problem, it may be best to harvest
the plants immediately and cut your losses.

What are they? Bananas are actually the exposed “male” parts of a pollen sac, called the “stamen” which would normally be surrounded by a sac to hold all the pollen until it bursts open. If you open up a fully
formed male pollen sac, you will see bananas (stamens) inside.

But when bananas appear on your plants, they don’t need to “burst” in order to spread pollen, they will immediately start making pollen and often will seed the buds that are close by even if bananas are removed
right away, and sometimes the pollen can drift to other plants and pollinate them as well, too.

The yellow bunches in this bud are bananas/stamens and will pollinate everything they can - they don't have to wait for a pollen sac to burst. Screenshot_11.png
If a female plant is allowed to go too long without being harvested or pollinated (allowed to go past the point of optimal harvest), she will sometime produce a bunch of bananas in her buds as a last-ditch
attempt to self-pollinate and create seeds for the next year. This is sometimes known as "rhodelization".
This is not as destructive as other types of hermies since it only happens after plants are already past the point of optimal harvest.

What causes it? While genetics does play a role in whether a plant is capable of producing bananas and mixed gender buds, environmental stress is often a big component in causing bananas to form. Luckily if
you stick with high-quality genetics, you are much less likely to run into bananas even if you do accidentally stress your plants.

What type of stress can trigger bananas to form on cannabis buds?

Inconsistent Light Schedules & Light Leaks - When plants don't get light at the same time each day, or if they're exposed to light during their dark period (light leak)

Heat - When temps get too high hermies and nanner often appear.

Too-Bright Light - Like too much heat, light that is too bright can stress your plants and trigger hermies. This is most often caused by growers keeping their lights to close to their plants. You can light-burn your plants even when temperature is under control.

Major Plant Problems - Major plant problems like nutrient deficiencies, root rot, pH problems, light-burn and nutrient burn can all trigger bananas to start growing

Genetics - While stress plays a big role in the formation of bananas, the tendency to form them seems to be genetic. This tendency is very common in the seeds of a plant that hermied - these “feminized” seeds,
while always female, are much more likely to show the same herming traits as its parent.Growing seeds that were produced this way is naturally selecting to produce more buds that grow bananas.

What should the grower do? It is recommended that you remove plants showing bananas from your grow room or grow area immediately to prevent accidental pollination of buds. If the pollen being formed is allowed to make contact with your buds, those buds will stop focusing on making more buds and will turn all their“effort” into making seeds. If the plant self-pollinates, you will end up with a bunch of sub-par seeds that are likely to have the same problem.

Of the different types of “uncertain gender” cannabis plants, plants with mixed gender buds (especially hermies with bananas) are the least predictable and most likely to cause unwanted pollination. This is
partially because with bananas the pollen sac doesn’t need to burst to pollinate buds - it will start pollinating almost immediately.

A grower who watches very closely can carefully pluck all bananas, but they are unlikely to be successful and will probabably end up with at least a few seeds.

Trying to salvage a plant that has started producing tons of bananas is NOT recommended, because it's hard to get them all and you'll end up with seeds. Even worse, once a plant gets started, bananas can appear in huge bunches overnight especially when the plant is stressed.

How to Avoid Causing Hermies or Bananas

This section will explain what you can do as a grower to reduce your chances of running into hermies or bananas in your grow room...

1.) Avoid Inconsistent Flowering Light Periods & Light Leaks

Keep indoor lights on timer, and avoid changing the light schedule if possible

Prevent outdoor plants from being exposed to street lights, flood lights or other types of artificial lights during the night.
Respect the dark period - In flowering it's important to make sure all your plants(except auto-flowering strains) get at least 12 hours of uninterrupted darkness every night. Avoid shortened dark periods and light leaks! No matter what the strain, try to keep your plants on a consistent schedule throughout their lives,as this helps them set their circadian rhythms. And for photoperiod plants in the flowering stage, do not interrupt the plant’s 12-hour dark period with light for any reason.
Why? During the dark period your plant is “counting” the hours until sunlight appears, and interrupting this process is one of the most common ways to stress the plant to produce bananas or hermies. It can also cause your plant to revert back to the vegetative stage.
Along with the point above, make sure you do not have any light leaks in your grow space, which could allow outside light to filter in during the dark period. During the dark period your plants like complete
darkness.
If anything ever happens with your timer or power that causes your plant to get too much light or darkness,it’s important to correct your timer as soon as possible. But don’t worry about it too much if it happens just for one day. It's usually okay if it happens only once, but be careful not to let it happen again since too much messing up the light schedule can cause hermies.

2.) Maintain Proper Temperature Through Flowering Stage

Maintain a comfortable temperature in flowering stage, between 65-85°F (18-30°C) - temps should be slightly cooler at night than during the day.

Always use “hand-test” to make sure it doesn’t feel too hot in the top canopy of buds under the light - Put one of your hands (palm facing down) under your grow lights where the top of your plants are located and wait 10 seconds - if it feels too hot for your hand it's too hot for the plants! Screenshot_12.png

3.) Don’t Give Your Plants Too Much Light (Light-Burn)

While generally more light is better for your cannabis plants, very high power brightness can light-burn your plants, which stresses plants, causes unwanted bleaching, and can trigger the plant to hermie on you.

With high power LED grow lights and big HID lights, make sure to always follow the manufacturer’s specifications as far as minimum distance from the top of the plants!

Don’t keep your lights too close because even if the heat is under control, too much brightness can cause stress too.

Light-burn is only common with high power LEDs (3W chipsets and bigger, x-lens technology, etc) and big HIDs or perhaps multiple smaller HIDs (usually with an intense cooling system).

It is more difficult to “light-burn” your plants with fluorescent lights, CFLs, smaller HIDs, etc - with these lights you only need to worry about heat.

High Power LEDs or HID Grow Lights Will Light-Burn Plants When Kept Too Close (yes, even if the temperature is completely under control) Screenshot_13.png

4.) Prevent Major Plant Problems

A huge stress to the plant can cause the plant to react in unpredictable ways, including producing bananas and male pollen sacs. Huge stresses include...

Major nutrient deficiency

Nutrient Burn - given too much nutrients

Pest infestation

Total leaf loss (usually as the result of overzealous defoliation or bugs)

Any other huge stress to the plant

Want to read about a real example?

The plant pictured to the right was subjected to cold temperatures and then grew directly into the grow light, putting it under a lot of stress. Screenshot_14.png

“So I left this girl (or what I thought was a girl, notice the pistils at the bottom calyx) over the weekend and came back to the plant up in the light getting burned. Yikes! I'm not too sure what happened
here but it got pretty cold the last few days. I think it's a hermie...”
A few days before this pic, the plant was just showing a few white pistils and appeared to be female.After the stress that it went through, the grower came back to a plant that was completely covered in male
pollen sacs, with the first few white pistils being the only sign of this plant being female.

5.) Always Start With Trusted Genetics

Hermaproditism and mixed gender buds seems to be more common when growing plants from bagseed(seeds that you find) or seeds from an unprofessional breeder.

Do feminized seeds cause hermies?

The reason this is so is because seedy buds are worth less than sinsemilla (unseeded buds). Therefore,if you find a seed in your bud, it likely was the result of either bad growing practices (male plants
weren’t removed in time) or due to some type of negligence (plants were stressed and self-pollinated,which means the next generation is most likely to do so).

When you’re buying seeds from a trusted breeder, they go to great lengths to prevent unintended pollination,and they specifically select for plants that don’t ever show mixed gender traits.

Which cannabis breeders can I trust?

And remember… even if you do everything right, sometimes you will run into hermie plants - it’s just a fact of growing. Sometimes these things just happen, for example...


“I've always felt like seeded weed was not nearly as potent as sinsemilla and I do everything in my power to KILL ALL MALES! Cannabis is so sneaky, though - last summer we had such wild weather that even a couple of clones turned out some male sex parts.”


~ Experienced outdoor grower Screenshot_15.png


"Cannabis has both male and female plants. When both female and male flowers are in bloom, pollen from the male flower lands on the female flower, thereby fertilizing it. The male dies after producing and shedding all his pollen. Seeds form and grow within the female flowers. As the seeds are maturing, the female plant slowly dies. The mature seeds then fall to the ground and germinate naturally or are collected for planting the next spring.

"Unpollinated, female cannabis flowers continue to swell and produce more resin while waiting for male pollen to successfully complete their life cycle. After weeks of heavy flower and cannabinoid-laden resin
production, THC production peaks out in the unfertilized, frustrated sinsemilla!"

~Jorge Cervantes in Indoor Marijuana Horticulture


Leaf Symptoms:
Abnormal Growth
Other Symptoms:
Buds Not Fattening


All text and photo' it's taken from Growweedeasy
 
Poslednja izmena: